

Adam's SR20DET Datsun 1600
Warning! This is a large page and may take a while to download; but please be patient, it's worth the wait! If you wish to read through the entire project in order, click here to go to the bottom of the page. There will be nothing further added to this page as Adam now has his own website which can be viewed here.
Update 9th November 2003
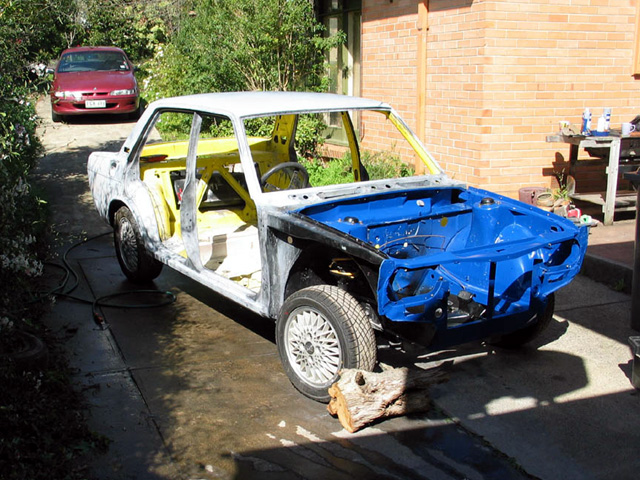
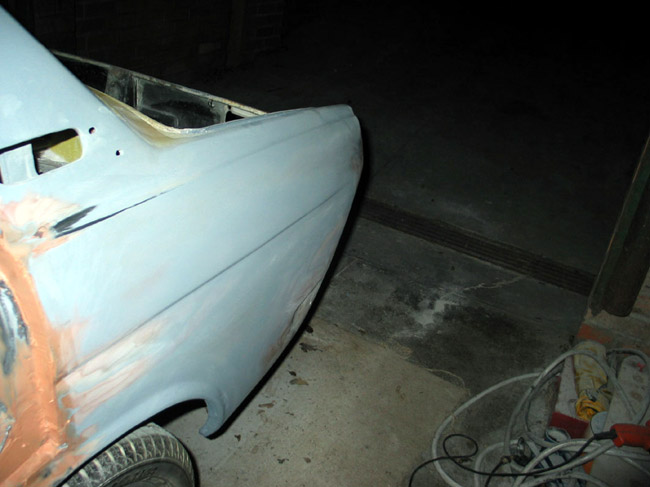
Well the datto is finally painted! The paint has come up quite well for a home job, not perfect but I'm pleased with it. All I can say is if you are going to have a go at painting a car yourself - USE ACRYLIC paint and apply it nice and thick (can't stress this enough as it saved my paint)!! It's so forgiving. I had a lot of problems with over spray build up on the roof and just little pieces of dust etc all over the paint once I'd finished spraying. As Charlotte knows, I was not happy at all, wanted to cut the datto up into tiny pieces and turf it all in the bin!
To give you an idea of how bad the roof was, when you ran your hand over the roof, it felt like extremely rough sandpaper! It looked absolutely shocking and the rest of the car had dust and crap stuck all over it and i mean *all* over it!
To fix my very ordinary spray job I did the following:
- Left a small fan heater on in the garage for about 30+ hours (this helped to shrink the bumps and lumps on the roof and rest of the shell)
- Once the paint was nice and dry, I rubbed it all back with some 800 grit wet and dry sandpaper
- The sanding leaves the paint looking quite dull so a cut and polish was in order (buffing pad fitted to a drill made light work of this task)
 |
 |
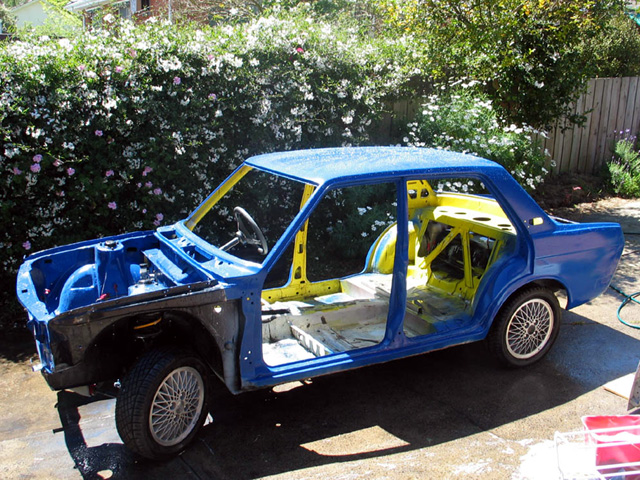 |
The paint still isn't perfect, but now if you run your hand across it the paint feels smooth and has a nice shine to it. I'm hoping to get started on putting all the wiring etc back in over the next few days so I can then get the engine back in and leave it in!
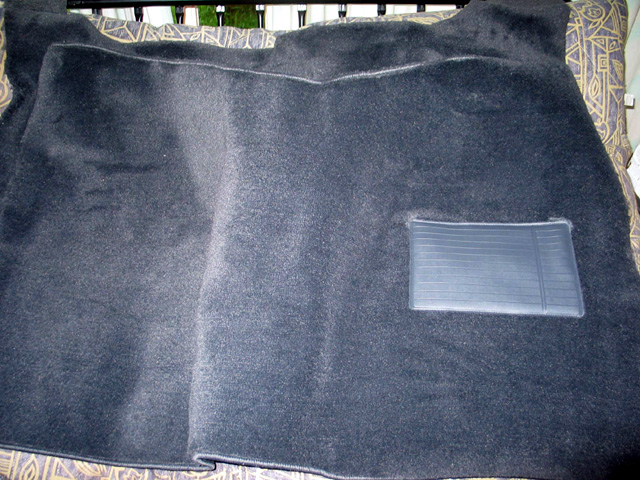
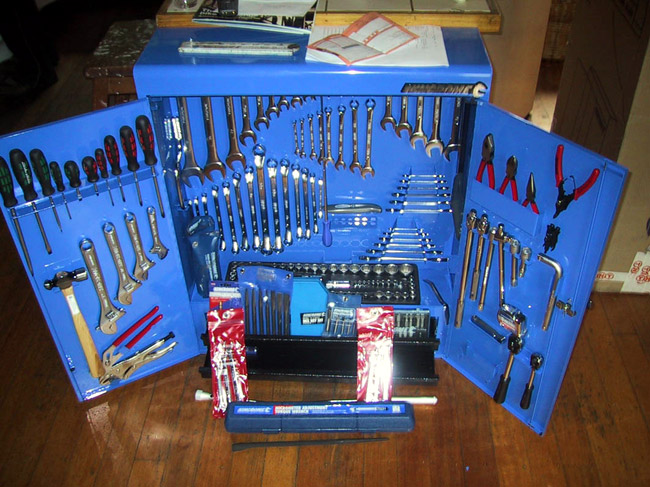
I've still been buying bits and pieces for the datto:
- alarm & central locking kit
- new carpet (charcoal grey)
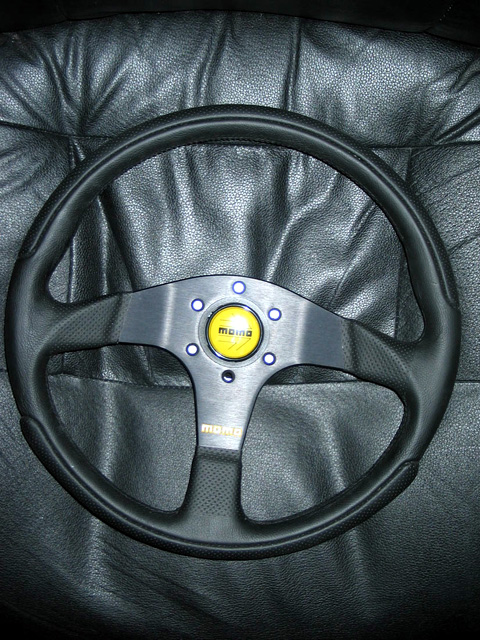
- received my steering wheel too :)
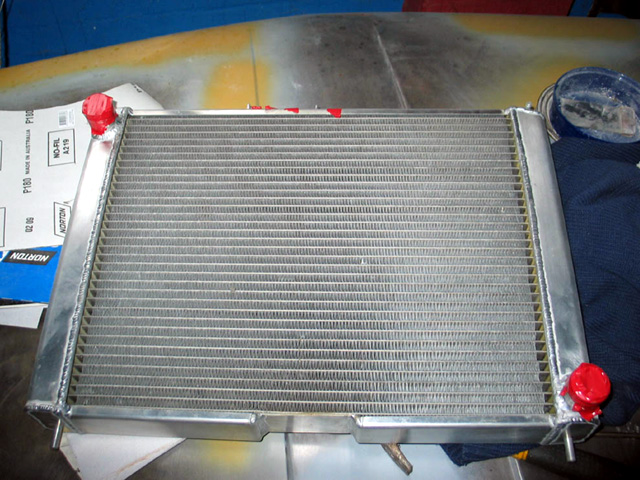
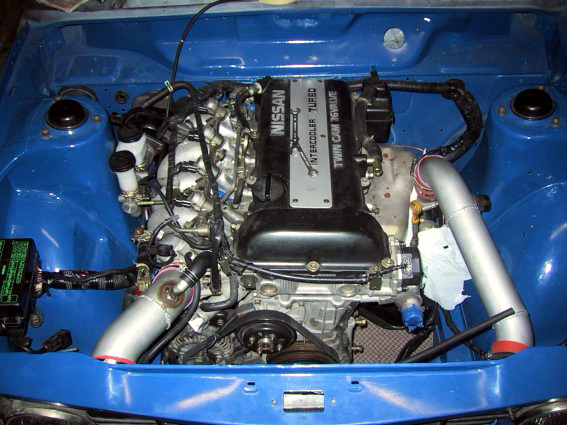
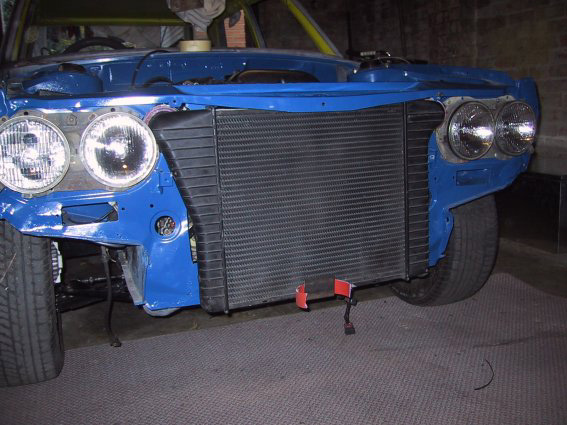
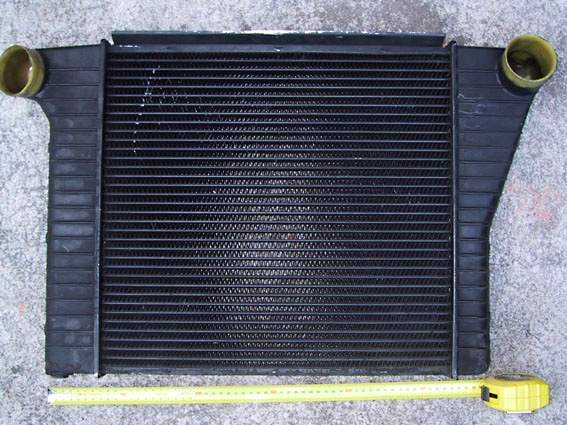
- picked up my new radiator (that i had custom made to fit inbetween my intercooler pipes)
 |
 |
 |
 |
I was quite restricted with the radiator in terms of size due to the inlet
and outlet location of my intercooler pipes (i.e. right next to the headlights).
The overall size is 570mm wide by 430mm high. The core is 475mm wide by 370mm
high. Due to the size restrictions and the fact that my intercooler takes up
the entire front of the car i went for a 55mm thick core just to keep the SR
nice and cool. The radiator was made by race radiators in Dandenong (Melbourne).
That's about it for now, hopefully there will be more interesting updates in
the next few weeks.
Update 15th May 2003
Ok, been a very long time since my last
update and I must apologise to Charlotte.
Very sorry Charlotte, I've promised you
a million times I would have updates but
have sent you nothing - sorry. [that's ok
Adam :) - CR] I've been working away on
the car but there has been very little noticeable
difference (visually).
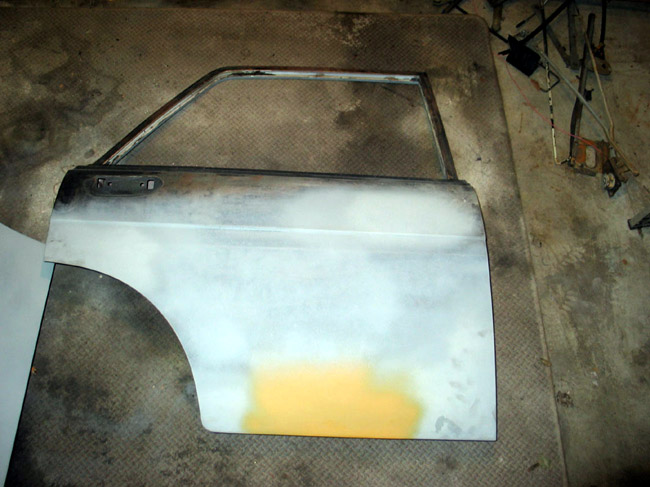
The bulk of the work I've been doing is
body work. I can't tell you how much I hate
this part. The worst part of it is the poor
little datto's body is in pretty bad condition
as you can see from the pictures. I had
to cut out and weld in two new channels
for the boot (see pics). Then grinding and
bogging up these parts seemed to take forever!!!
But turned out really well, let me know
what you think.
 |
 |
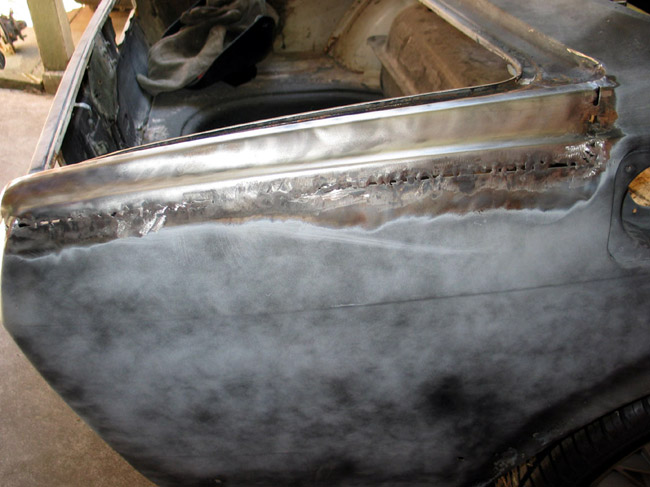 |
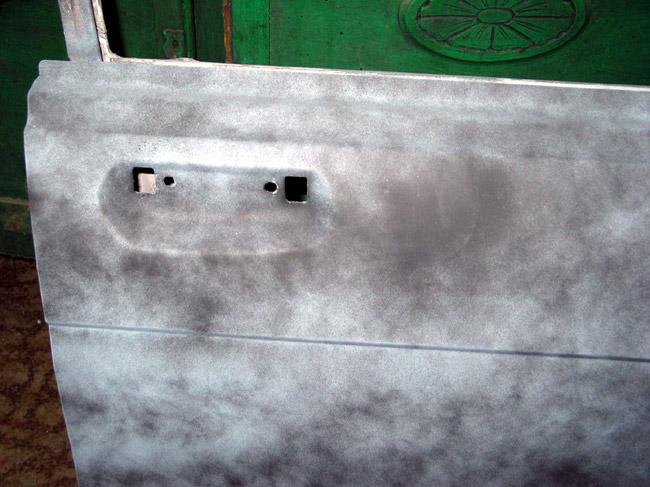
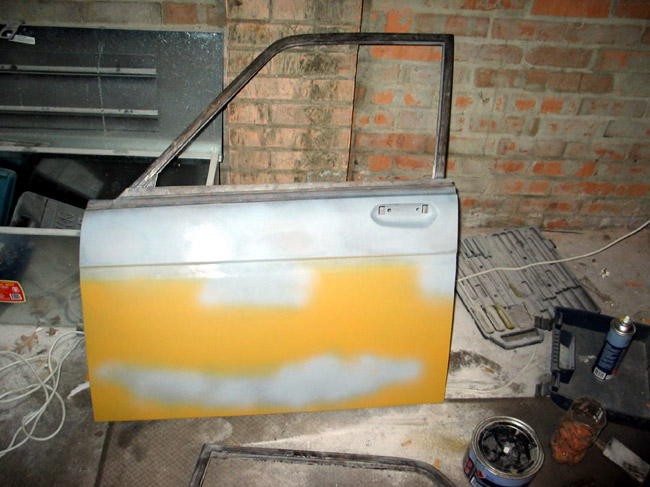
Next on the list was to prepare all the panels and luckily for me every single panel needed a certain amount of bog in it... I'm going to be driving a gigantic pile of bog. But who really cares if it gets up and boogies right. All in all I think the body should turn out quite well though. I've welded up the door locks (see pics) and they look great. The idea was more about security than anything cosmetic. My previous car (a vh commodore) had the door lock popped out quite easily when it was broken into. So the little datto will be fitted with keyless entry and an alarm.
 |
 |
 |
Apart from body work, I've been purchasing bits and pieces along the way.
 |
 |
Got my ECU modified by Pete Lieberg (sr20transplantsgroup) and it's a very professional looking job. Thanks again Pete! He provided me with 4 maps -
- valet map (limits to 3000rpm and 60k's - good for when you get your roadworthy certificate etc...)
- stock map
- hot map for drag racing etc
- hot map for circuit racing

I got myself a MAF from a 300zx, cost me a little too much. But should be worth it when I finally save the money for a larger turbo and bigger injectors. Check out how restrictive the stock sr20det MAF is compared to the 300zx one.

Momo steering wheel should arrive this week along with boss kit. (will send pics as soon as I get it)
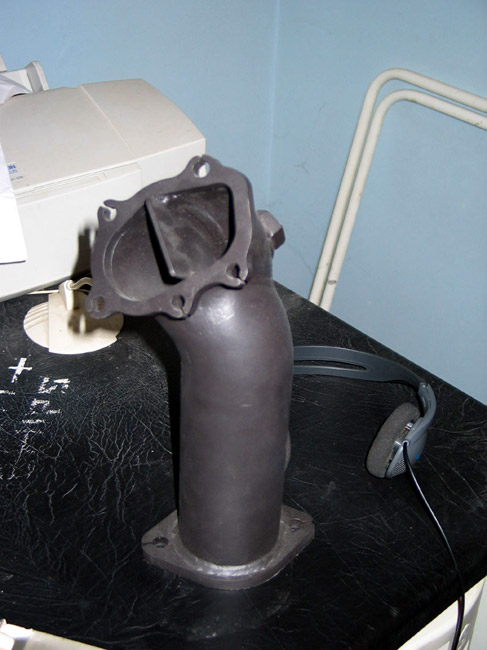
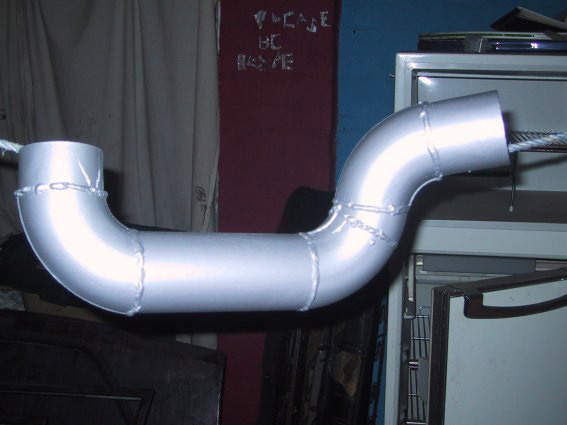
The first dump pipe I made was pretty well crap, so again i turned to Cam McKinnon and as you can see the new dump pipe I have is finished off superbly.
Ooo yeah, got brand spanking new tyres for the old datto. Yokohama A539s up front and some cheaper Sava's on the back. I figured that with the SR in there I'd end up chewing up rear tyres like there's no tomorrow. The Sava's are supposed to be a good *cheap* performance tyre (if there is such a thing), so we'll wait and see.
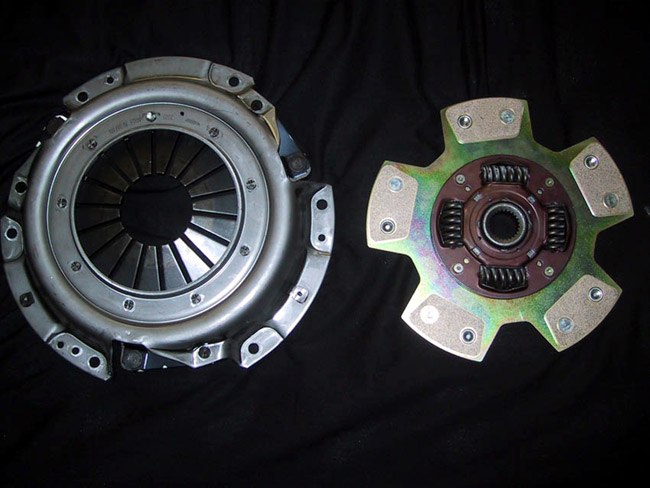
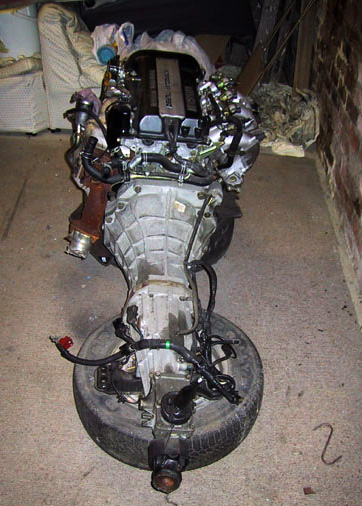
Bought a button clutch and new pressure plate (see pics). Many thanks go out to Geordie Smith for this (sr20transplantsgroup member). When I first put the engine in I had all the driveline hooked up. When trying to put the car in gear, I basically couldn't. It would either crunch or not go into gear at all. If the car was jacked up I could get it into gear easily.
 |
 |
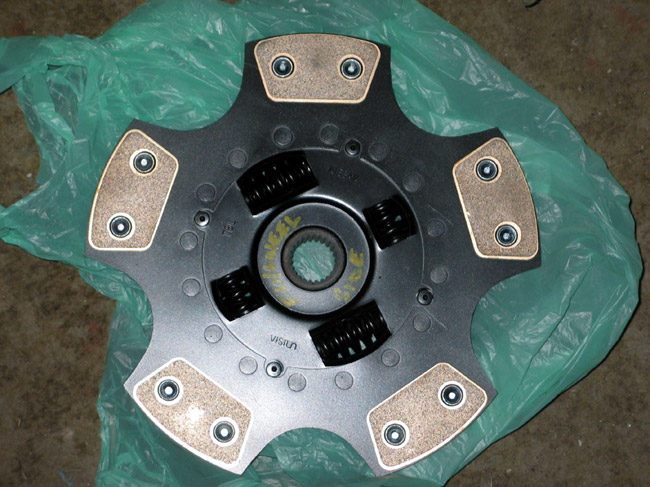 |
First thought was that the clutch cylinder
wasn't doing it's job so i got a new one
... still no go. Finally bit the bullet
and took the gearbox out to find the lovely
clutch you can see in the pictures. I have
no idea how a clutch could ever get this
bad and am hoping that it was from the accident
that the front cut I bought was in. Anyways,
ended up speaking to a number of people
on the sr20transplants group (very handy
bunch of people indeed) and decided that
a button clutch and new pressure plate were
needed. I got a Daiken clutch and reco'd
pressure plate for $450. Actually, Geordie
Smith sourced this for me as all the dealers
in Melbourne wanted exhobitant amounts for
this setup (~$700 riiiip offfff). The new
clutch looks great and is supposed to bite
like there's no tomorrow, can't wait to
give it a bit of curry.
That's about all I've done so far, but I will do my best to update more frequently. The paint should be done very very soon. Just depends on Uni.
Cheers,
Adam
Update 27th August 2002
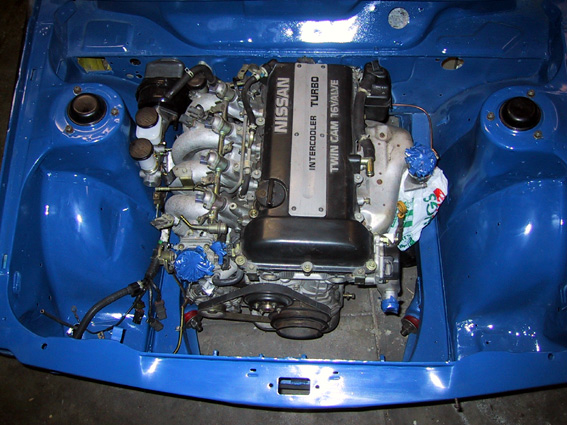
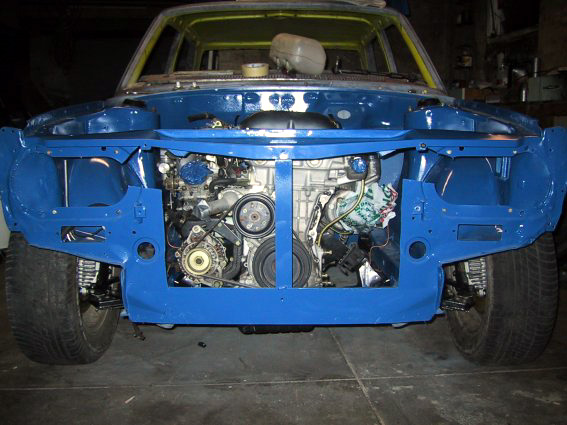
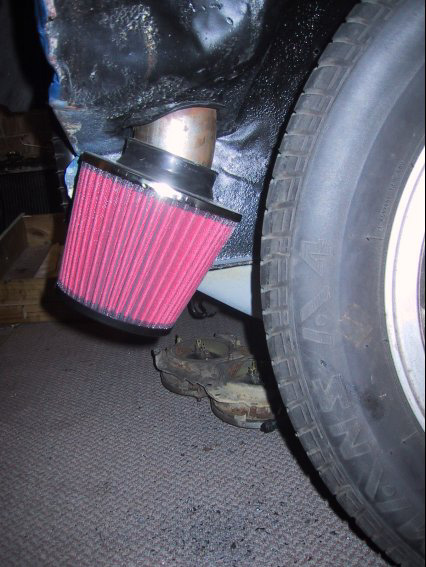
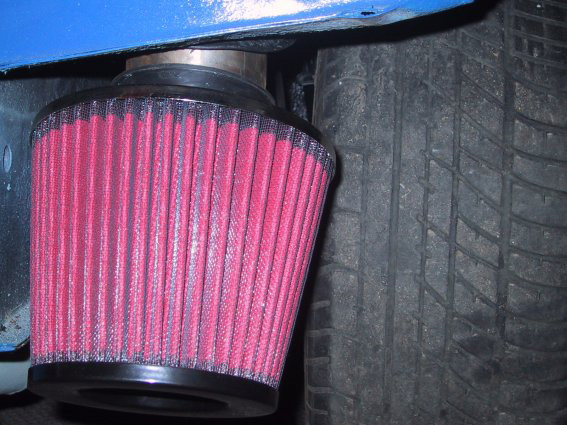
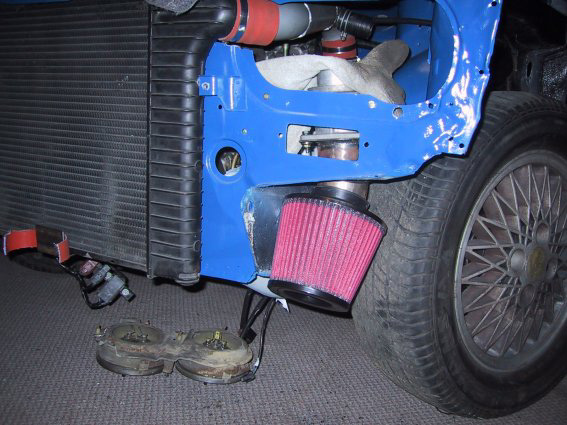
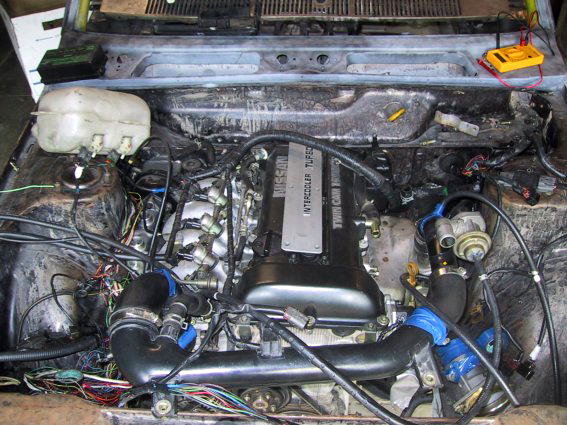
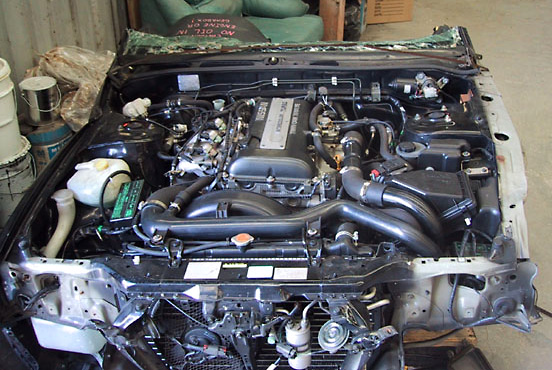
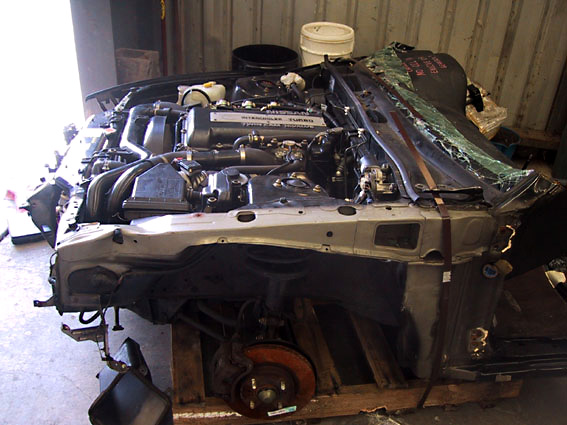
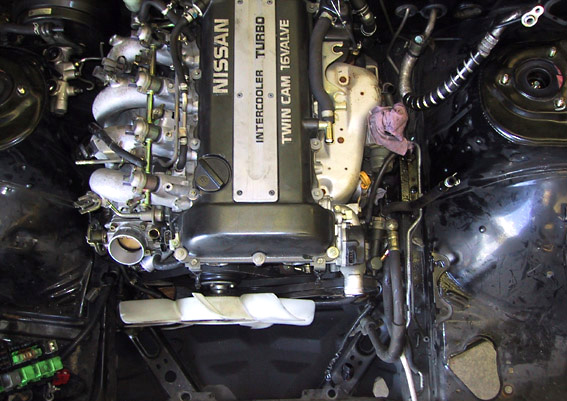
The engine's back in and I've made up mounts for the intercooler which fits in very tightly between the headlights. In fact I've had to grind off a lot off the headlight mounts in order to fit the intercooler in. I made up the intercooler pipes and have made the inlet pipe up. Also followed Cam's idea of mounting the pod outside of the engine bay (see pic). Should scoop up a lot of cool air, still need to make up a splash guard for it though.
 |
 |
 |
 |
 |
 |
 |
 |
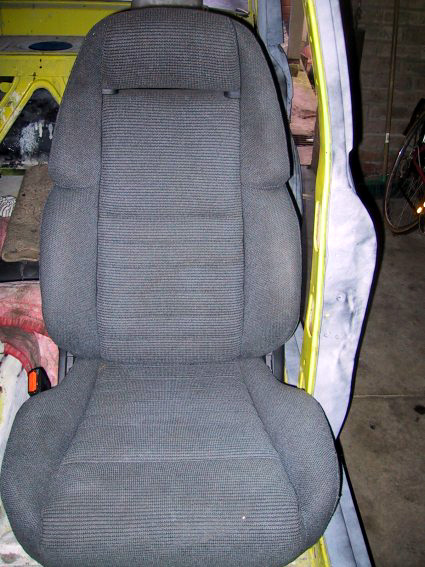
I've begun fitting my seats (300zx electric seats) and it's kinda strange to
have electric seats in the datto (novelty value) and they are super comfy seats.
There were a few problems with them because they are a little thicker than the
stock 1600 ones and my head would touch the roof without the headlining in.
So I had to make up some mounts and actually mount the seats behind the stock
mounting points. Plenty of head room now, but there won't be much room for anyone
sitting in the back (oh well that will never be me :) ).
 |
 |
 |
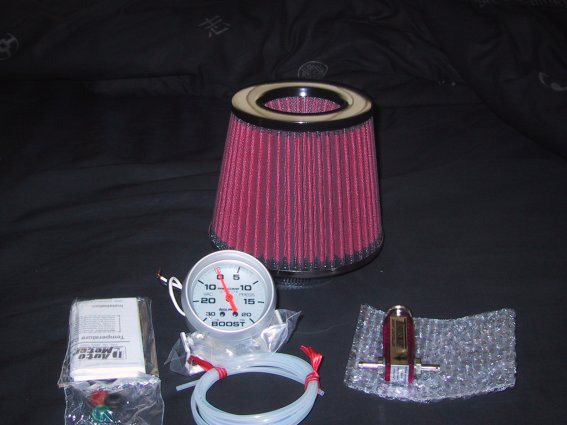
I also bought a boost gauge, boost controller and pod. Haven't had a chance
to fit the boost gauge, but will hopefully get that done in the next week when
the engine is up and running once again. The only other thing that needs to
be done on the mechanical side of things is run the rear brake line and get
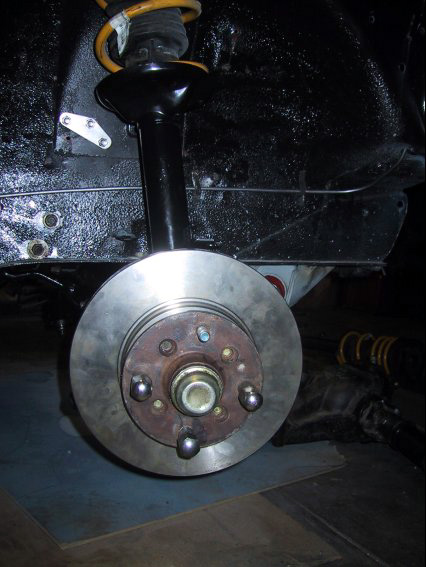
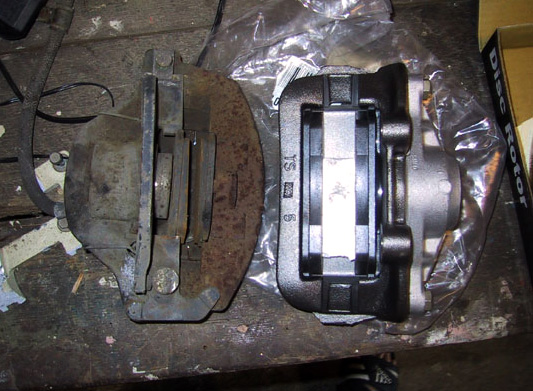
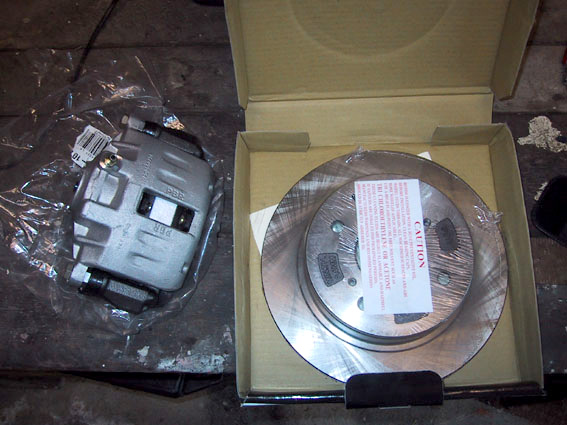
a radiator made up. The front and rear discs are all setup now too.
That's about all I've really done, it's taken quite a while to make up pipes etc ... heaps of cutting and welding and the welding is driving me nuts, getting serious headaches from it...
 |
 |
 |
Update 25th April 2002
Quick bit of advice, never ever ever ever use any type of rust transformer/converter
or whatever they like to call it. I used this and it has a tendency to get stain
your hands/skin from simply touching it (even if the surface is dry). I ended
up having to sand it off, supposedly it's hosed
off, yeah right! I then repainted/primed.
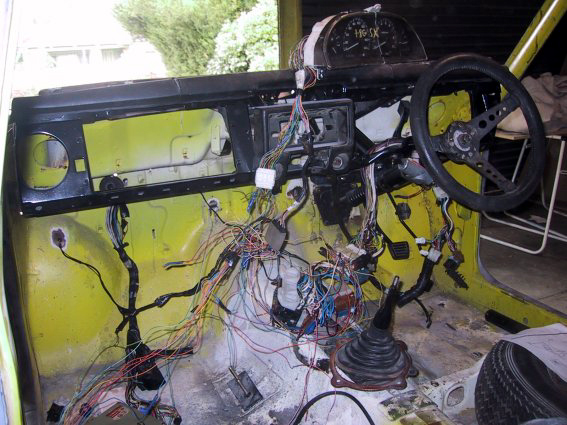
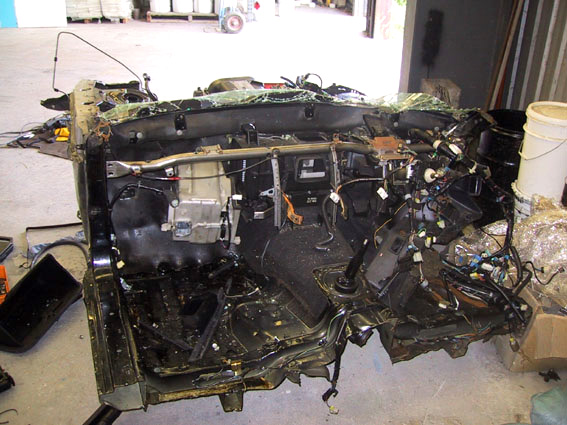
After spending 2 to 3 hours a night over the past week I finally managed to get all the wiring sorted out. Then you'd think it would simply be a matter of plugging this in there and turning the key, right? Wrong, nothing ever seems to work out like that. After plugging in and double checking everything (or so I thought), hooking up fuel/fuel pump and connecting the battery, I finally was ready to turn the engine over for the first time (well first time for me).
Cranks over nicely, but doesn't start. Ok check fuel is hooked up correctly,
yup, check for spark NUP. I couldn't for the life of me figure out why it wouldn't
start. Everything seemed to be hooked up correctly. I remember reading an article
(by Geordie Smith from SR20transplants
group)
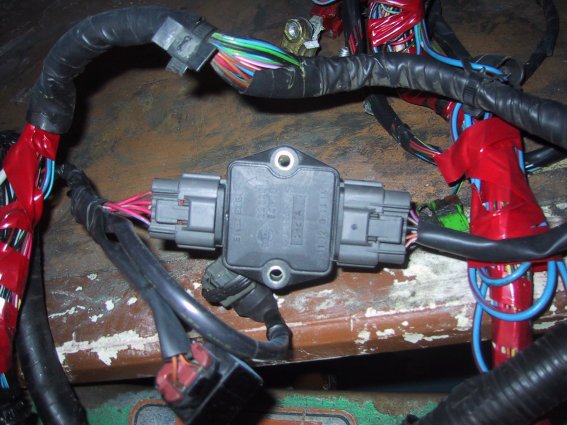
and he had the same problem, ie engine cranked but no spark. How'd he fix it?
Simple really hook up the freakin ignitor pack arghhhhhh god damn I'm an idiot.
 |
 |
 |
Ok plug the ignitor pack in and turn key (remember this is 8:15am Sunday morning and there is no exhaust on the motor bar a tiny dump pipe) and vrooooooooommmm well a little vrooooom and more farting really (listen to sound file). But it started and that called for a big yeeeeeeeeeeeeeeeeeeeehaaaaaaaaaaaaaaaaaaaaaaaaaa followed by my flatmate racing down to the garage as he thought i'd finally been crushed by the car :)
Click here to hear Adam's car! (right click then 'Save Target As' - WAV file - 35 kb)
Anyways the engine started and that was great, but the tacho wasn't working. I'm using the 180sx dash so after pluggin it in the tacho didn't work. Time to grab the multimeter out and check what's going on here. After checking a few wires it was pretty obvious that there was no power going to the tacho, hooked up some power dodgily to test it and voila it WORKS! Great that's out of the way, now to start the engine a couple more times and rev the bejesus out of it.
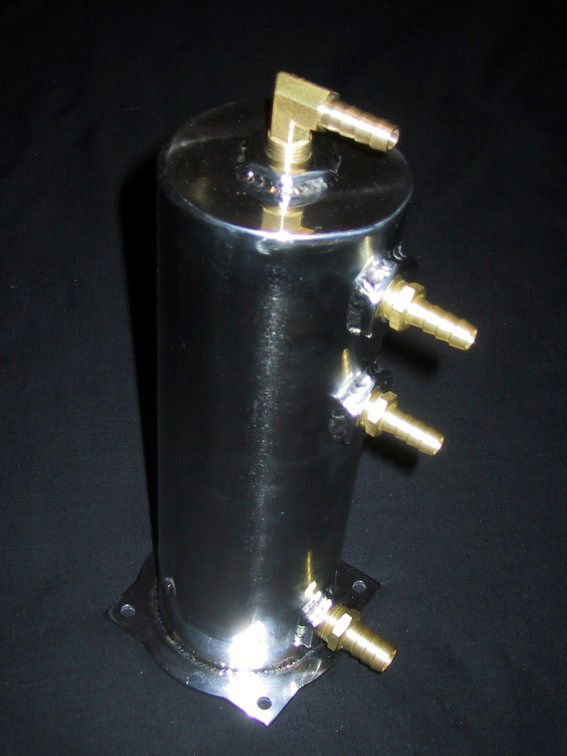
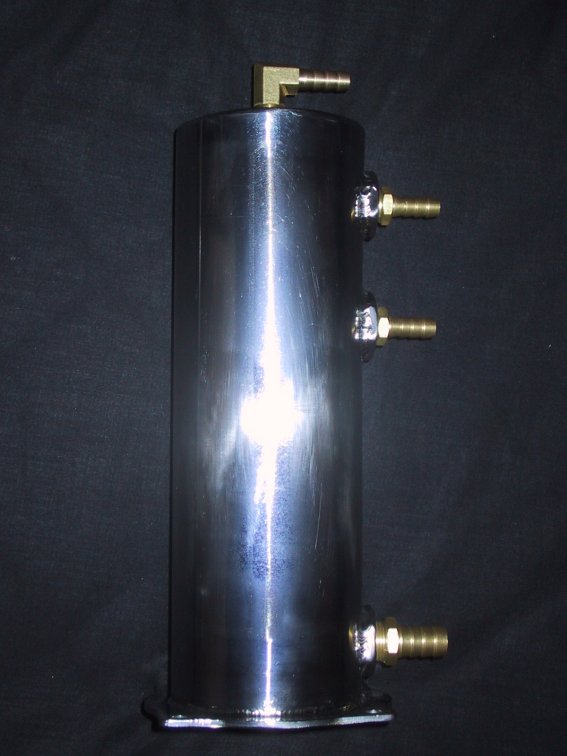
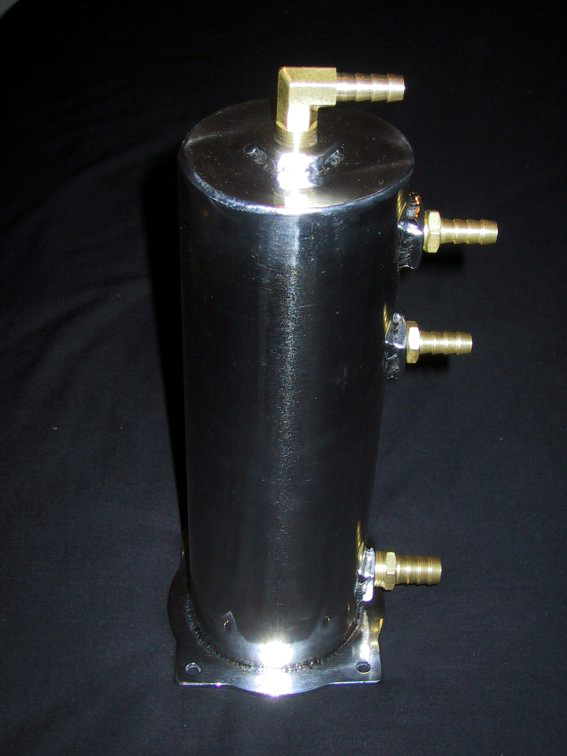
Oh yeah i forgot to mention, I picked up a surge tank from Cam Mckinnon (www.sprite.com.au/cm510) and it looks absolutely fantastic as you can see.
 |
 |
 |
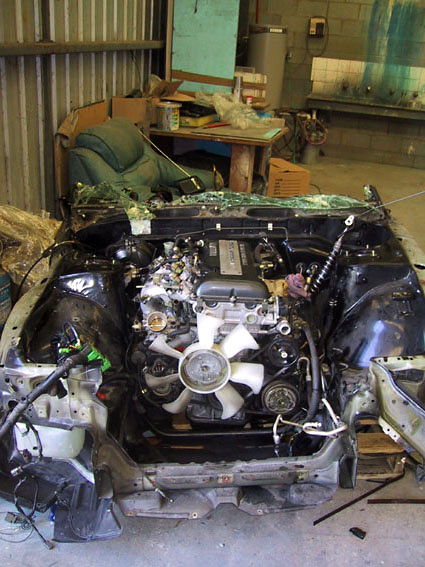
Alright, engine starts, intercooler fits. Time to pull out the engine and paint the engine bay.
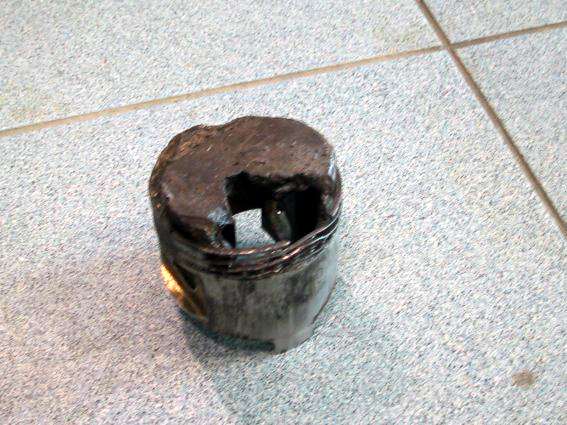
Had to hire an engine crane from the local hire shop and i got to talking ot one of the blokes that works there. Turns out he races those Baja volksy things and he reckons that shell synergy petrol is not very good for his engine and judging by the piston (well part of a piston) that he showed me I'm inclined to believe him.
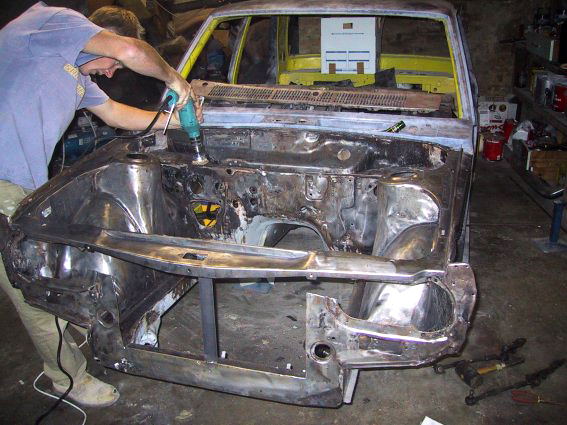
Anyways the engine came out pretty much without a hitch, just tore a tiny hole in the firewall. No matter, that was welded back up in no time.
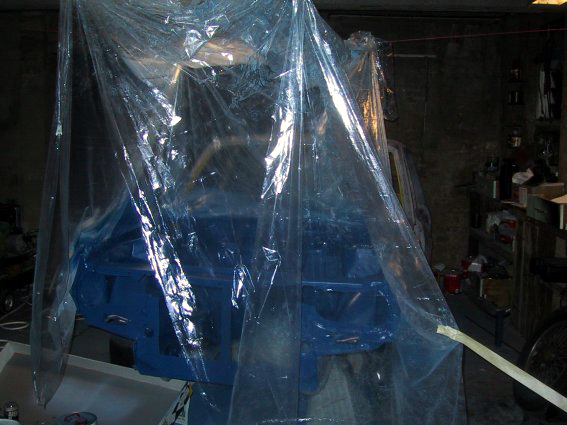
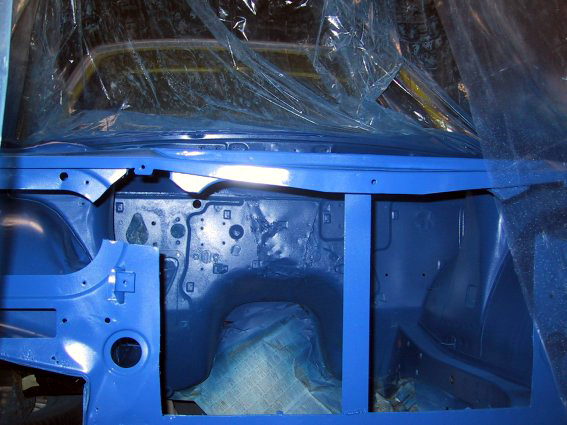
The engine bay was taken back to bare metal (again) to get rid of that rust convertor rubbish. It came up pretty well as you can see from the pic and after applying an etch primer i proceeded to apply a couple of coats of primer. Waited for it to dry and then applied 3 coats of color. I've been a little worried about the color that i chose (being too bright etc..) but it's starting to grow on me.
 |
 |
 |
 |
Anyways, that's about where I'm up to the at the moment, hopefully brakelines, fuels lines etc will go in over the next week.
cheers,
Adam
Update 24th February 2002
The engine is finally in but I had quite a few dramas on the way. For starters as you can see in the pic the engine mounts didn't line up with the X member. I have no idea why and neither did the bloke who made up the fitting kit for me. To rectify this problem i made up some spacers out of 1mm pipe (see image II).
The actual lifting of the engine and getting it in the engine bay with gearbox attached wasn't such a big task. Infact it only took around 25 minutes by myself. This is of course not including installing X-member and the likes, just getting the engine in and bolted up.
Once the engine was in properly I jacked up the gearbox to get an idea of how much would need to be cut out of the transmission tunnel in order to get the gear lever through (mark out roughly where to cut). I then let the jack off and cut out a nice big hole. :) (see image III)
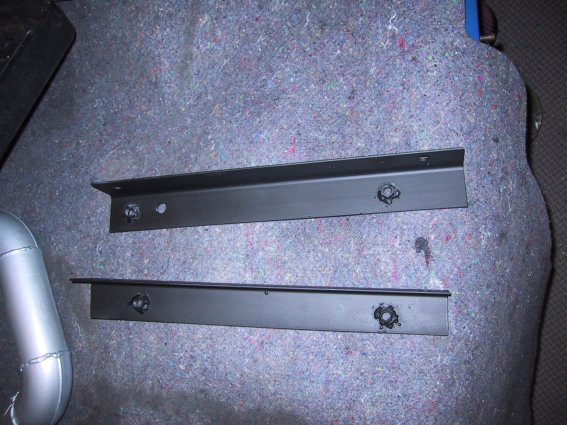
The next drama was the gearbox X-member. The bolt holes were so far out it's not funny. So to fix this I've purchased some 2mm sheet metal and am going to redrill the holes in the body and use the 2mm metal as reinforcing in the interior (pics to come when I've done this).
A couple of tips - when dropping in an engine & gearbox, jack the back
wheels up as high as possible (remember to chock the front wheels well too :)).
This makes it much easier to get the two in. Don't do it by yourself unless
you want to chip paint unnecessarily. It is easy enough to do by yourself, but
the best bet is to get a mate to help out.
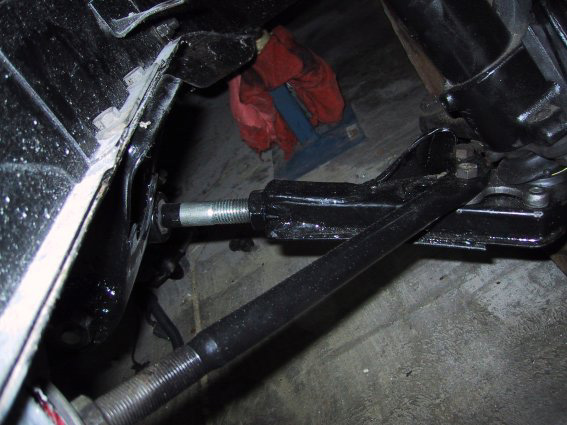 image I |
 image II |
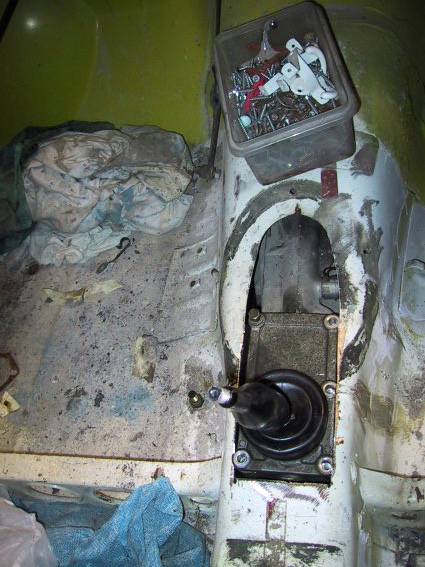 image III |
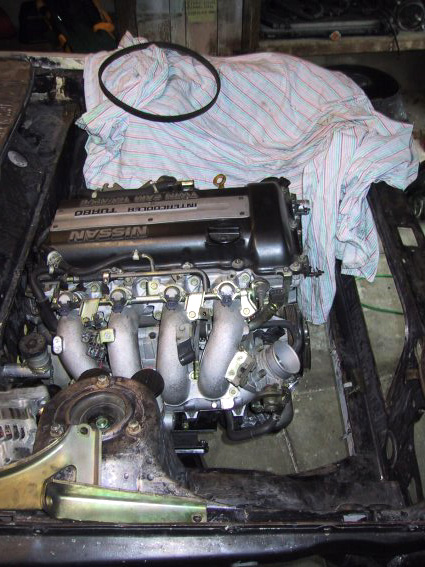 image IV |
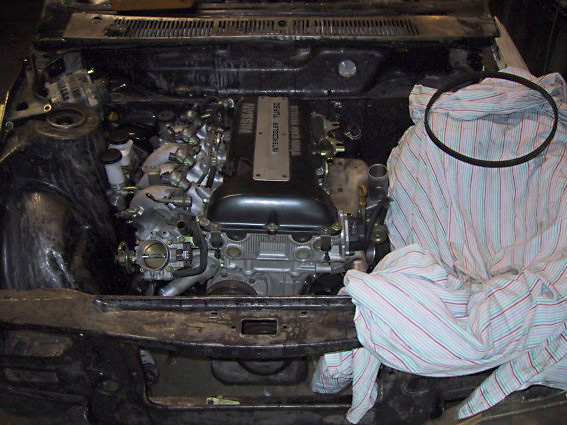 image V |
Update 22nd January 2002
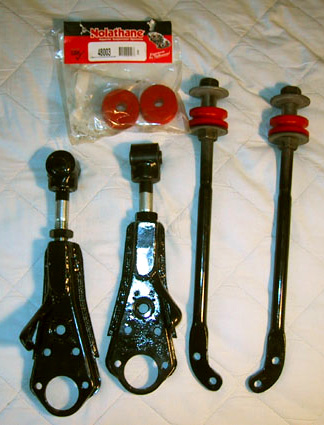
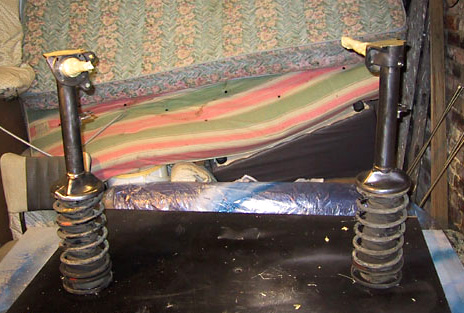
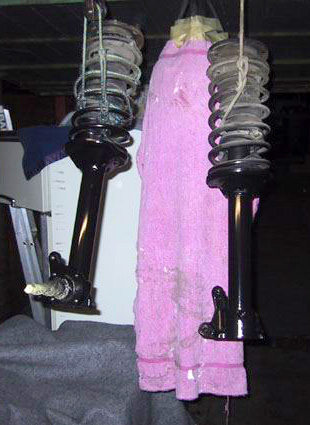
Some more purchases - adjustable castor rods and new lower control arms -
Update 16th January 2002
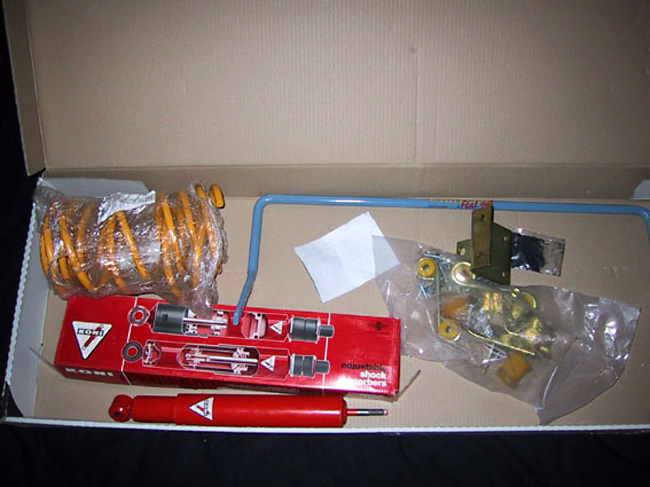
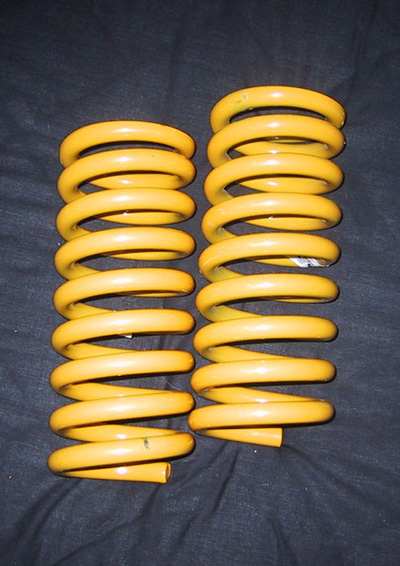
Adam has now purchased a few more bits to put on the datto, including front King springs, adjustable rear Koni shocks and an adjustable rear sway bar. Have a look at the pic, and more updates are expected soon...
This will be an ongoing feature so check back often to see the latest news and images of the conversion process. This is the first installment in what will be a detailed and comprehensive story of an SR20DET transplant into a Datsun 1600, including all related modifications and improvements such as paint, brakes, drivetrain and suspension. In Adam's own words...
Project Information
Timeline
I am hoping to get everything complete by Easter in time for Easternats at Sandown Raceway next year. Although this will depend on money and how far I can stretch it! :)
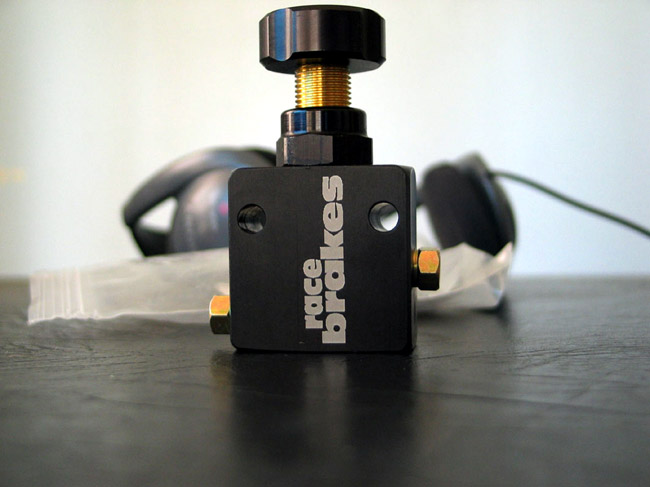
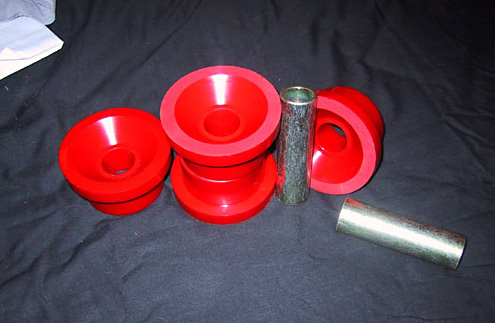
Brakes
- Front VL turbo calipers (already have these), verada rotors are on order as you have to buy blanks and apparently they are only made each time a new run of that particular rotor is made.
- Rear R31 Skyline/Pintara calipers and rotors (have these), handbrake cables etc.
 |
|
Suspension
- Front (180B struts) to have Kings springs, not sure of inserts as yet
- Rear lowered h/duty Kings springs (have these) and adjustable konis (getting this week along with front Kings springs)
 |
 |
 |
 |
Engine
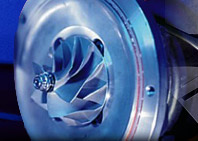
- Nissan SR20DET :) stock internals, Volvo 740 intercooler
- a ball bearing T28 turbo would be nice, but depending on funds this may not come about until after the car is complete
- radiator will be N13 Pulsar (should get this in the new year)
- MadDat fitting kit (24mm sway bar, g/box mount, modified engine x-member, polished steering box brace, modified tailshaft with new unis)
- rear x-member (4" exhaust hole, new bushes)
 |
 |
 |
 |
 |
 |
 |
 |
 |
 |
 |
 |
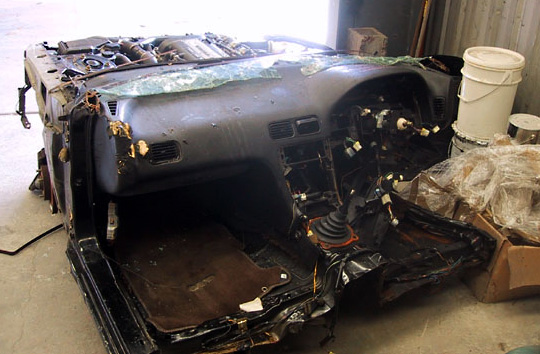
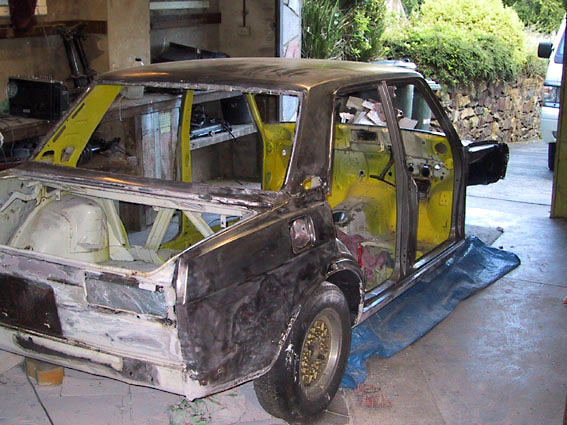
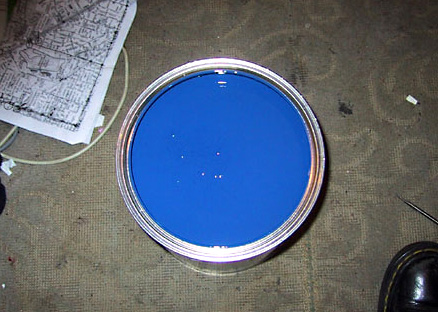
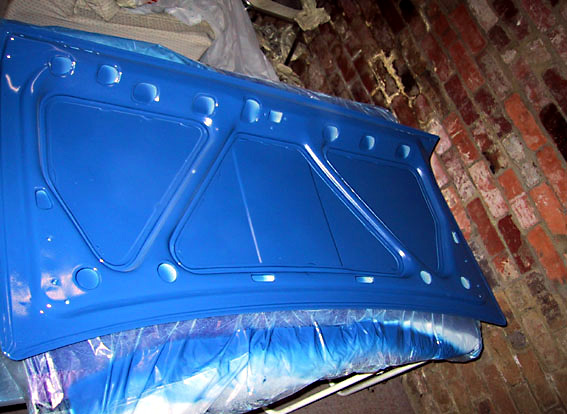
At the moment I'm in the process of stripping the shell, as you can see from the photos. I've managed to strip 2 doors and the entire shell (external only). The interior is yellow and will be given a few coats of blue (see pic of boot lid). I chose this color basically because I love the Brock VK Commodore color and I thought that the little Datto would look great in a few coats of blue.
 |
 |
 |
 |
Hopefully by around the 14th of January next year the shell will be complete and ready to plonk the donk straight in. Fingers crossed along with toes etc.....
If you would like to contact Adam with questions about the conversion, e-mail him here.
home | editors cars | readers rides | technical | gallery | media | videos | links | contact | sitemap