 1-800-419-1152
 Contact
 Andy's Parts Smarts
 Cart
Cart
Hello, Sign In!
07 HONDA FIT WEAPON R STREET HEADER INSTALL
Car : 2007-2008 Honda Fit 1.5L
Header : Weapon R Street Header
Header : Weapon R Street Header
Tools needed :
14 mm
12 mm
10 mm
Ratchet
14 mm
12 mm
10 mm
Ratchet
Item showed up not long after delivery was confirmed.
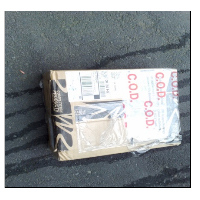
Item still in package
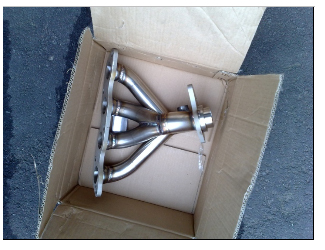
Package opened to reveal header
Step 1 :
This step is optional but highly recommended.
While the engine is cooling, spray all bolts with some WD-40. It will eat through the rust and will make your job easier.
This step is optional but highly recommended.
While the engine is cooling, spray all bolts with some WD-40. It will eat through the rust and will make your job easier.
Step 2 :
Remove Heat Shield.
This shield is held in place by 3 bolts (10mm). They are easily accessible from the top.
Note that this shield will not be reinstalled with the WR header so it doesn't matter if you break a bolt !
Remove Heat Shield.
This shield is held in place by 3 bolts (10mm). They are easily accessible from the top.
Note that this shield will not be reinstalled with the WR header so it doesn't matter if you break a bolt !
Package opened to reveal header
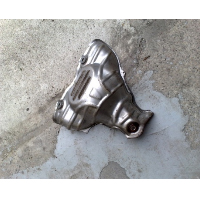
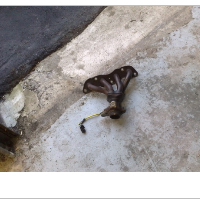
Heat shield once removed
Step 3 :
Remove Header.
This step is very easy once you know how to reach each bolt. There are 2 bolts (14mm) on the top part of the header and 3 bolts (14mm) on the bottom.
The 2 top bolts are easily accessible from the top of the car.
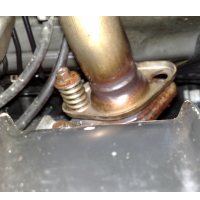
The bottom bolt on the passenger side is accessible from the bottom of the car
The bottom bolt in the middle is accessible from the bottom of the car
The bottom bolt on the passenger side is accessible from the top of the car.
Since these bolts will be reused, it is important not to break them. We recommend heating them up using a blowtorch or some sort of heating device.
It is recommended not to completely unscrew the bolts right away. If they are removed right away, it will put excess stress on the 2 spring loaded bolts that connect your header to the downpipe.
Once you have loosened the five header bolts, it's time to remove the 2 spring loaded bolts (14mm) that connect to the downpipe.
Remove Header.
This step is very easy once you know how to reach each bolt. There are 2 bolts (14mm) on the top part of the header and 3 bolts (14mm) on the bottom.
The 2 top bolts are easily accessible from the top of the car.
The bottom bolt on the passenger side is accessible from the bottom of the car
The bottom bolt in the middle is accessible from the bottom of the car
The bottom bolt on the passenger side is accessible from the top of the car.
Since these bolts will be reused, it is important not to break them. We recommend heating them up using a blowtorch or some sort of heating device.
It is recommended not to completely unscrew the bolts right away. If they are removed right away, it will put excess stress on the 2 spring loaded bolts that connect your header to the downpipe.
Once you have loosened the five header bolts, it's time to remove the 2 spring loaded bolts (14mm) that connect to the downpipe.
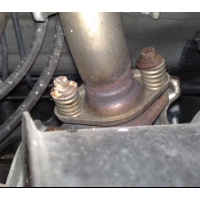
Once again, these bolts will be reused so be careful with them !!!
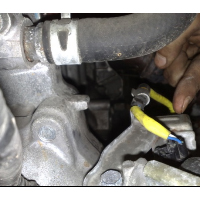
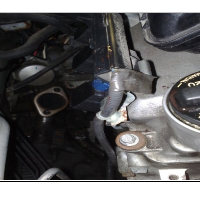
PS : You unscrew them from the spring side (as shown in picture)
One bolt off !
View from the top. As you can see, these bolts are pretty rusted so be careful
Step 4 :
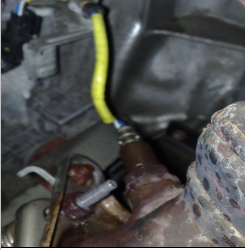
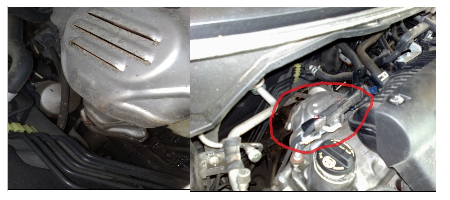
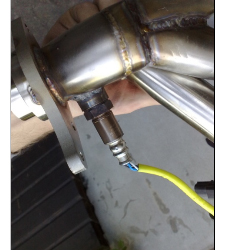
It is now time to remove the O2 sensor.
From the top, you can locate a yellow wire connecting into your header, this is your O2 sensor.
Follow the wire (it should be going to the driver side). You will see a black connector. Unplug it.
Your O2 sensor is now disconnected
You can now remove the remaining 5 header bolts. We recommend removing the lower three first. Be aware
that once all screws are removed, the gasket will fall. Be sure to catch it !!!
Here are some pictures:
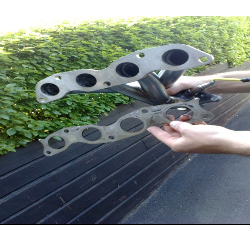
Stock header
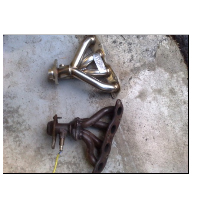
Comparison of the two headers
No header in the motor
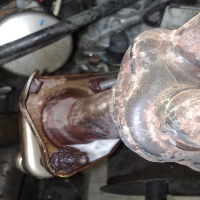
Clean view of the downpipe
WR Header with gasket
Step 5 :
Reconnect O2 sensor in new header.
Step 6 :
Remove bottom gasket from the old header. You will probably need to spray some WD-40.
Once it is removed, install it on the new header.
Remove bottom gasket from the old header. You will probably need to spray some WD-40.
Once it is removed, install it on the new header.
Step 7 :
Re-install new header.
The tricky part is placing the header and aligning the gasket (the one connected to the manifold). The easiest way to do this is to start from the top. First, place a bolt connecting the header to the gasket (this bolt will simply be used to keep the gasket and the header aligned). Now place the other bolt. Try to screw it in place (doesn't need to be tight). Once those 2 bolts are placed, the header will stay in place and the gasket will be aligned. You can now screw the remaining 3 bottom bolts.
Once all bolts have been placed, tighten them to 33 lbs-ft using a torque wrench. If you do not own a torque wrench, simply tighten them until you feel resistance and then add half a turn.
It is now time to bolt the 2 downpipe spring loaded bolts. Once again, tighten these bolts until
the spring touches the downpipe, then add 2 full turns.
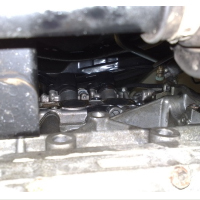
You now have a new header installed !!!
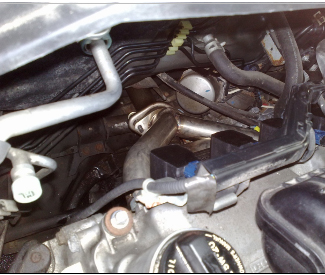
WR header installed
Note : when you first start your engine after the install, some smoke may appear. Don't worry, it is
simply the grease from your hands along with the WD-40 that is burning. It should cease within a few minutes
