 1-800-419-1152
 Contact
 Andy's Parts Smarts
 Cart
Cart
Hello, Sign In!
REPLACING BRAKE PADS
I just bought a 97 Firebird last week, and the rear brake pads needed to be replaced. I didn't know how
to replace brake pads myself, so I enlisted my automotive-genius father-in-law to help me change the brake pads.
First, we took off the wheels. We unfastened the lugs and removed both rear wheels. That exposed the brake
system, which includes the rotor, caliper, brake pads, pistons, and brake lines.
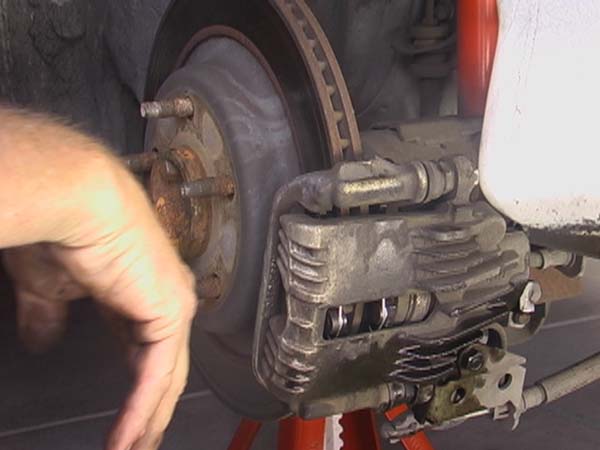
Picture of the Brake System
Next, we removed the brake caliper. The caliper houses the brake pads and is connected to the brake lines,
and the caliper's function is to clamp the brake pads against the brake rotor when you hit you brakes. So to access the brake
pads, we needed to remove the caliper assembly. It's connected to the rotors with a couple of bolts.
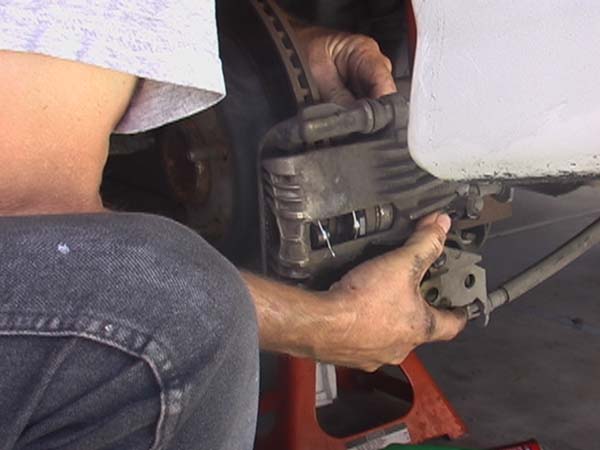
Removing the Brake Caliper
We then needed to empty any brake fluid out of the assembly. There is a small spigot you can open to release the
fluid, but it won't come out unless you squeeze the assembly and "squeeze" it out. You can see we used a pipe wrench to do it.
You apply pressure as shown in the picture, then loosen the spigot to let the fluid out, then immediately tighten the spigot
afterward to prevent air from getting in, and then after the spigot is tightened you can release the pressure on the brake
assembly.
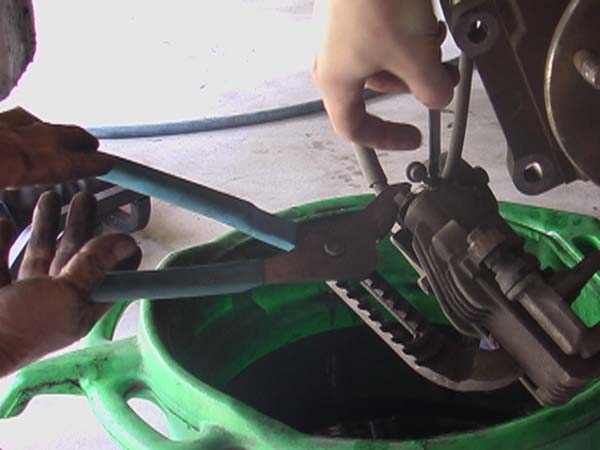
Removing Brake Fluid
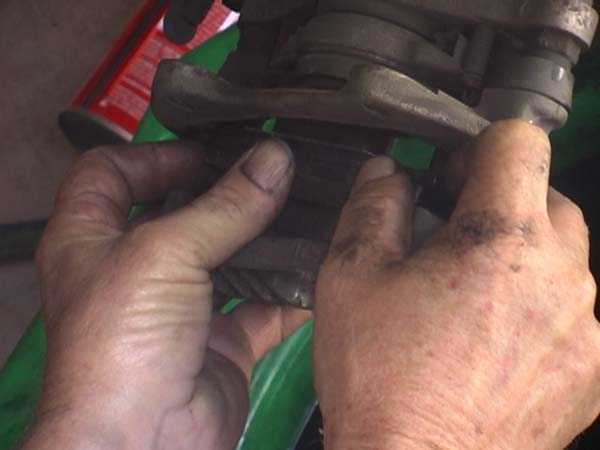
Then it was time to change the pads. To be sure, you should look at your brake pads to see if they need to be
replaced. If the 'pad' part of the brake pad is even thickness or less thick than the 'backing' part of the pad, then they
should be replaced. It's a little tough to see, but if you look carefully you can see that my pads were less than even thickness
relative to the backings, and needed to be replaced.
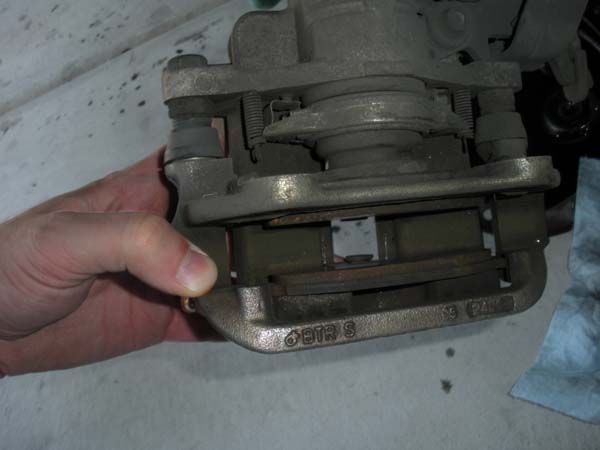
Picture of Old Brake Pads in Caliper
It turned out the pads were extremely simple to remove. On the bottom of the pad are two little L-shaped springs.
They sit inside a rectangular groove in the caliper. You push each pad downward into the groove, then slide it inward (past the
respective locking mechanisms) and it just slides right out.
Then you take each new brake pad and put it back in the same way. I went with Powerstop organic brake pads. I wanted
something as close to factory as possible. My new brake pads had a pad with more than twice the thickness of the backing of the
pad.
Push down on the pad so that the springs are compressed into the rectangular grove, and slide them under the locking
mechanisms on each side, and let go, and it gets locked into place. Keep in mind the outer and inner brake pads are different within
the caliper, so be careful to match up the pads correctly.
Installing the New Brake Pads
Now the caliper is ready to re-attach to the rotor. Before you do that, you may want to take a moment and clean your
brake parts. You can brush the rust off your rotors, like we did here.
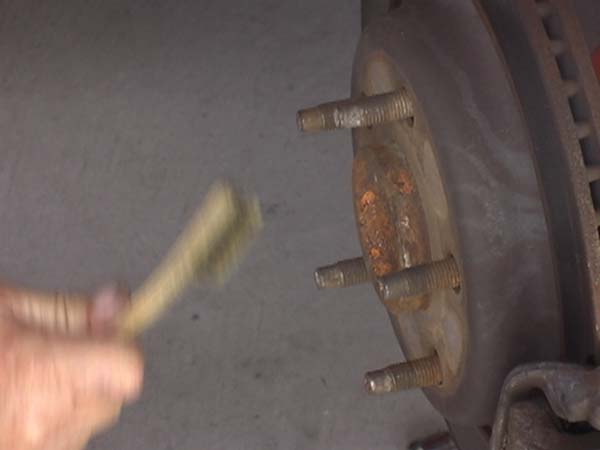
Brushing the Brake Rotor
Then fit the caliper over the rotor, and bolt it back in using the same two bolts from before. Now you can put the
wheels back on. It's up to you, but you may want to put a lubricant on the threads before you slide the wheels on, just to make
sure they don't seize up.
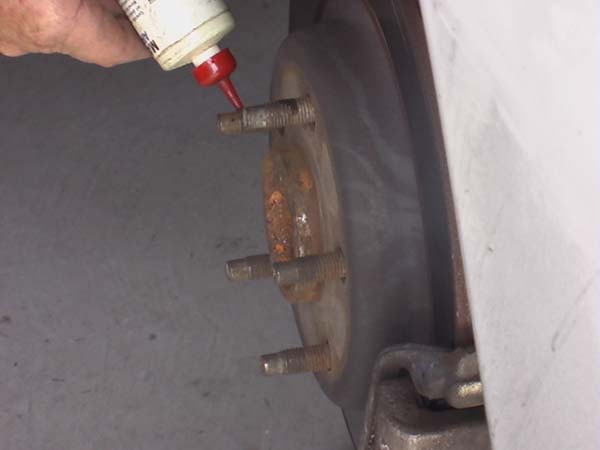
Applying Lubricant to Prevent Seizing of Threads
Also, when you put your wheels back on, make sure you know which wheel goes on which side. On my Firebird, the tires
are directional, and the 'arrow' shape in the tire should be pointing forward.

Making Sure the Tires are Facing the Right Way
Now the brakes were ready to test. This is very important: before you go driving on the road, pump the brake pedal
several times. The first couple times, the pedal will go all the way to the floor. This is because of the brake fluid drained
during the process. Pumping the brake pedals gets the fluid flowing through your brake lines again.
After you start to feel normal resistance in the brake pedal again, then you'll want to put the vehicle on the road
and try to really heat up the pads. What we did is take the car around the block 4 or 5 times and at each stop sign, we'd floor it
and accelerate really fast, and then stop really hard at the next stop sign. This is an effective way to heat up the pads and break
them in.
After you've broken in the pads, you're all set to drive with new braking power. I was amazed how easy it was. It took
about an hour from start to finish.
