 1-800-419-1152
 Contact
 Andy's Parts Smarts
 Cart
Cart
Hello, Sign In!
HOW TO INSTALL AN INJEN COLD AIR INTAKE ON A 2005-2006 SCION TC
Tools Needed: 10mm Socket Wrench, Flat head screw driver
Note: Installation procedures vary by vehicle
Note: Installation procedures vary by vehicle
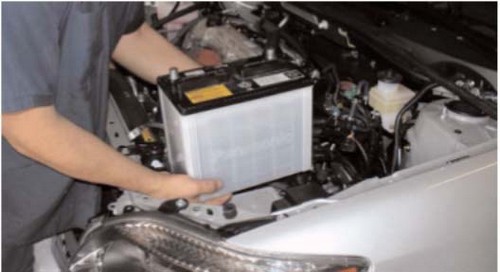
Remove the battery tray from the engine compartment prior to starting this installation.
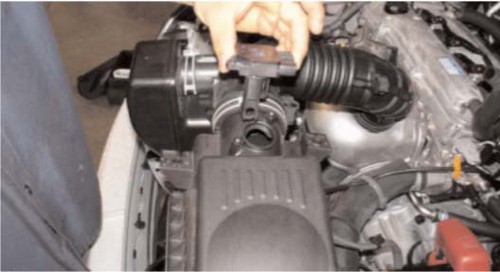
Remove the mass air flow sensor (MAFS) from the stock air intake box and set it aside for further instructions.

Loosen the clamp at the throttle body and disconnect the air intake box from the resonator duct leading into the
fender well. Pull the entire stock air intake box and duct from the engine compartment.
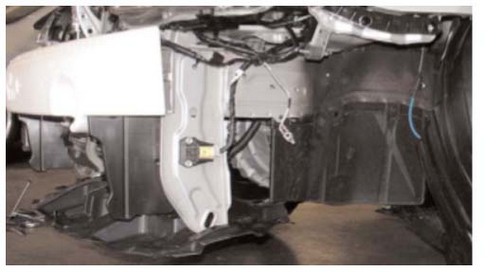
Remove the entire front bumper by removing all bolts and plastic clips holding the bumper in place.
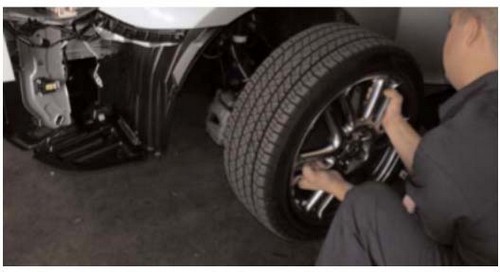
Once the stock air intake, air duct, battery and bumper have been removed from the engine compartment,
proceed to remove the driver side wheel.
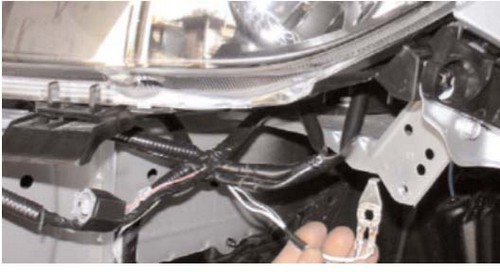
Locate the grounding wire on the bracket connected to the frame. This ground will be re-located in order
to place the second vibra-mount in place.

The grounding wire is now being relocated to the frame of the tC (A). The ground wire is now firmly
secured in place (B).
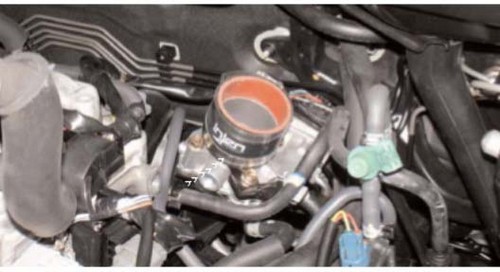
Place the 2 1/2" straight hose over the throttle body. Use two clamps but only tighten the clamp
on the throttle body.
Take one of the vibra-mounts in this kit and screw it into the existing bracket used for the stock
air intake box.
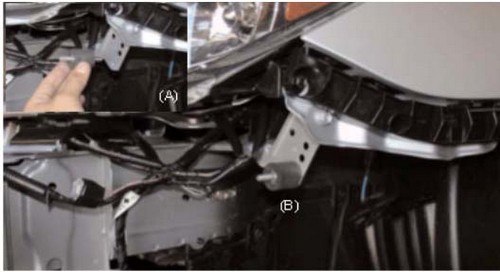
Take the remaining vibra-mount and screw it into the bracket where the grounding wire was once located
(A). Screw the vibra-mount into the bracket until it bottoms out (B).
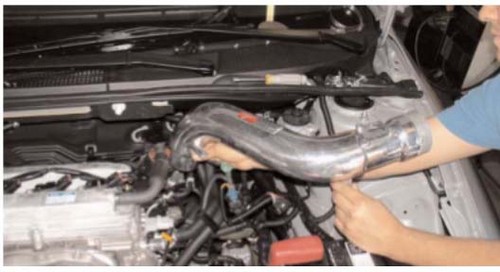
Position the primary intake over the hose on the throttle body and carefully press it into the hose.
Once the intake side of the primary intake has been pressed into the throttle body hose, continue to
align the intake bracket to the primary vibra-mount. When the bracket has been aligned, use the fender washer and
flange nut to secure the intake in place.
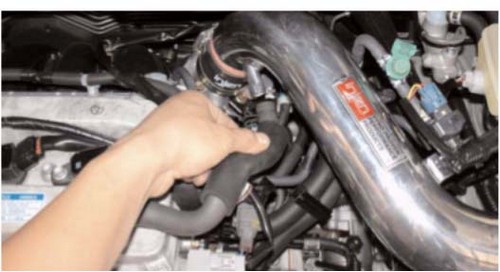
After the intake has been positioned for the best possible fit, take the stock breather hose and
connect it to the 1/2" port on the intake.
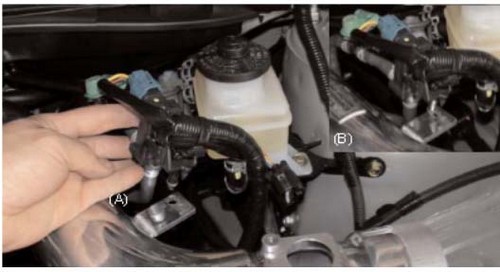
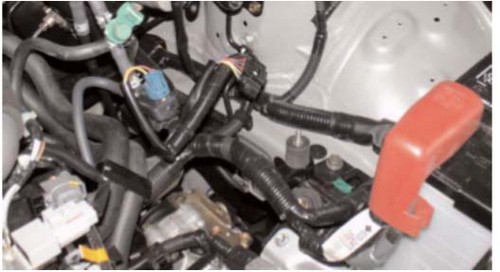
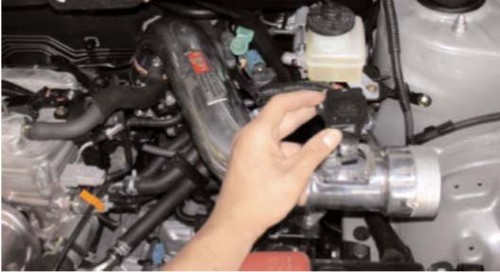
Injen has designed a holding bracket for the vacuum switching valve (VSV). Simply take the VSV and
press the stud into the pre-drilled hole on the bracket (A). Once the VSV has been aligned it will sit flush in
the bracket(B).
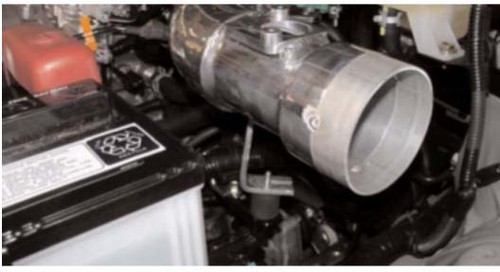
Take the stock mass air flow sensor and press it into the dyno-tuned adapter made specifically for
the tC. Use the stock screws to fasten the MAFS into the machined adapter. We recommend that you moisten the O-ring
with a light oil or water in order to prevent damage to the O-ring prior to installing the sensor.
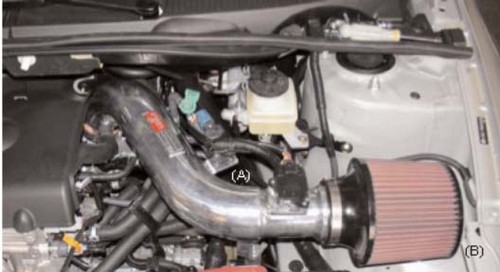
The MAFS is pressed into the adapter and sitting flush (A). Make sure that there are no air leaks
in the sensor. The cold air intake can also be converted into a short ram as seen in this picture. Simply, press
the air filter over the end of the primary intake (B).

Injen has supplied a 12" vinyl trim to be placed around the resonator opening. This will prevent
any damage to the secondary cold air intake system.

The secondary intake system is inserted through the bumper. Close attention is placed on the
resonator opening when going up and into the engine compartment (A). Once the intake has been fitted, the
top end is butted up against the primary intake. Now align the bracket to the vibra-mount stud and use the
fender washer and flange nut to secure them (B).
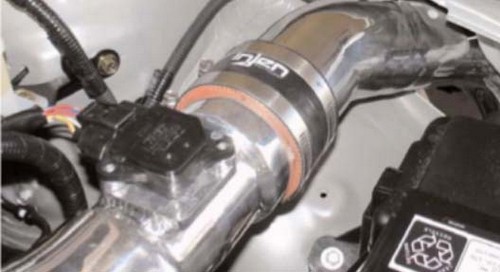
The primary and secondary intakes are joined together. Using the 3" straight hose and fasten
with the clamps once they have been aligned.
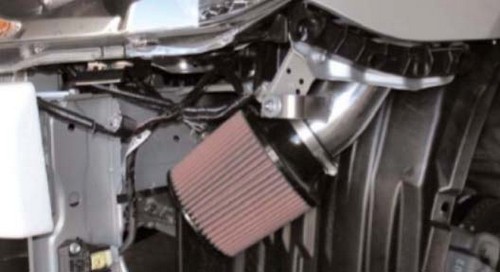
The filter is placed on the end of the secondary intake and fastened to secure the filter in place.
Align the entire intake for proper fitting. Once proper clearance has been made through out the length of the intake,
continue to tighten all nuts, bolts and clamps.
1. Upon completion of the installation, reconnect the negative battery terminal before you start the engine.
2. Align the entire intake system for the best possible fit. Once the intake has been properly fitted continue
to tighten all nuts, bolts and clamps.
3. Periodically, re-check the alignment of the intake system and make sure there is proper clearance around
and along the length of the intake. Failure to follow proper maintenance procedures may cause damage to the intake and will
void the warranty.
4. Start the engine and listen carefully for any odd noises, rattles and/or air leaks prior to taking it for
a test drive. If any problems arise go back and check the vacuum lines, hoses and clamps that maybe causing leaks or rattles
and correct the problem.
5. Check the filter for excessive dirt build up. Congratulations! You have just completed the installation.
Enjoy the added power, sound and performance of your new intake system.
