




 1-800-419-1152
 Contact
 Andy's Parts Smarts
 Cart
Cart
Hello, Sign In!
AEM COLD AIR INTAKE INSTALLATION ON A 2003 CAVALIER

AEM supplies all the parts you will need to install this system, right down to zip ties for cruise control.
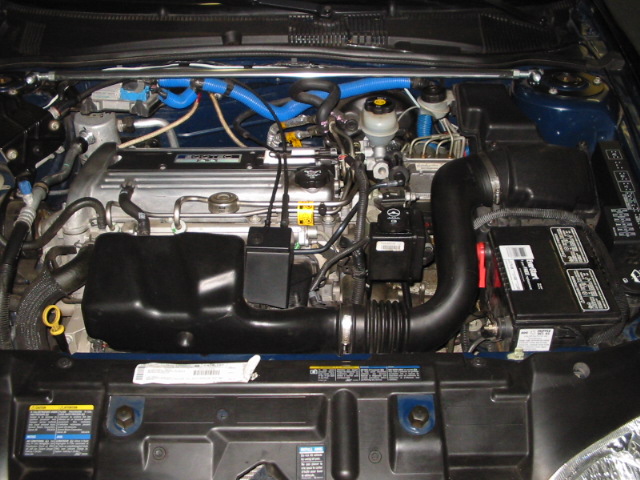
The Cavalier stock intake system, notice the restrictive tubing and air box.
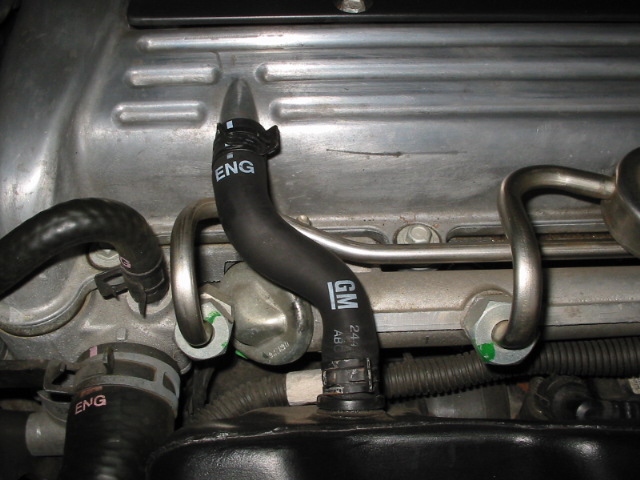
Using the pliers, slide the pinch clamp on the breather hose away from the valve cover and pull the breather hose
off of the valve cover.

Pull the vacuum hose of the stock intake and remove the IAT sensor and grommet. (our test vehicle had the vacuum line
run to a different fitting which will be discussed later in the install)

Release the hose clamp that holds the air box onto the throttle body. There is a hole that allows access to the screw
on the throttle cable bracket located to the right of the throttle body.

Release the hose clamps that hold on the intake pipe between the air box over the throttle body and the upper air box.
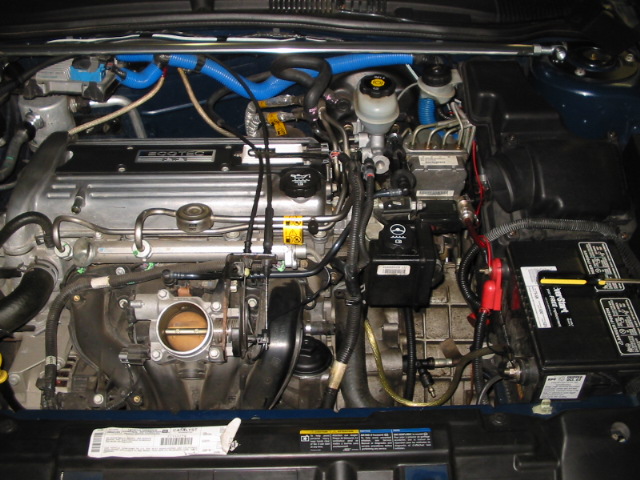
Remove the intake pipe and the throttle body air box.

Unhook the positive and negative battery terminals.

Loosen the battery hold down and remove the battery.

Release the wire ties on the stock air box.

Remove the fuse box fastener.

If you have a manual equipped car, remove the clutch reservoir from the factory air box.

Remove the stock air box pulling up and towards the front of the car.

Jack up the driver's side front and remove the front wheel. * Always use jack stands when raising a vehicle*

Remove the fender lining by removing the 7mm bolts and plastic retainers that hold it in place.
With the fender well liner removed, you should see a large black piece that looks like a reservoir of sorts. This is
the intake resonator. It must be removed to make room for the intake.
Notice the long threaded bolt with a 10mm nut installed. This bolt holds both the intake resonator and the washer fluid
bottle in place. Remove this nut. The intake resonator is also held in place by 2 plastic snaps at the bottom. Simply grab hold of the
resonator and work it out through the fender well hole. Release the wire ties, unplug the washer motor, and pull the hose from the washer
motor (all this must be done from under the front end of the car). Catch the washer fluid in a container

Remove the three 10mm bolts and one 7mm bolt that holds the washer reservoir in place and drop the reservoir. Two of the
10mm bolts are not visible from the wheel well. One of the three 10mm bolts is located at the upper part of the front of the reservoir
and the second 10mm bolt is located at the bottom part of the front of the reservoir.

Apply the supplied 4x6 rubber membrane as shown in the picture.

Install the rubber mount from the inside of the engine bay as shown in the picture.

Secure the rubber mount from inside the fender well with a supplied washer and lock nut.

Install supplied bolt and washer through the hole in the strut tower from inside the fender.

Place the inlet pipe in engine bay as shown. Do not fasten in place. The pipe may take a little persuasion to fit down
into the fender well.

Apply the supplied 2x4 rubber material to the intake pipe as shown.

Place the front mounting tab over the exposed end of the rubber mount and loosely fasten with a supplied washer and lock
nut. Do NOT tighten down fully.

Install a rubber mount to the fuse block tab.

Place the rear mounting tab over the bolt mounted through the strut tower and fasten loosely with a washer and locknut. Do
NOT fully tighten. We found it easiest to use a 10mm wrench to hold the locknut while using a ratchet to tighten the bolt from inside the
fender well

Secure the fuse block to the rubber mount using a supplied washer and locknut. Make sure all wires are routed properly.

Loosen the 10mm bolt for the positive lead on the fuse block and rotate the wire counterclockwise as shown.

Install the hump coupler to the end of the pipe. Do not tighten the hose clamps.

Install the short silicone hose onto the throttle body

Locate the vacuum fitting between the right two runners on the intake manifold. Remove the vacuum cap and route the vacuum
line from the fuel rail down to this fitting. (you may also use the supplied filter that AEM has included in the kit)

Install the black intake pipe over the throttle body and loosely tighten down with the supplied hose clamp. Do NOT fully tighten.

Mate the two intake pipes together using the supplied hump coupler and tighten the two hose clamps. Make sure the clamp screws are
on the side of the intake pipe AWAY from the battery. Tighten down the two mounting points on the intake pipe and the hose clamp over the throttle
body.

Install the IAT sensor and grommet in the AEM intake pipe.

Install the supplied breather hose with the two small hose clamps. Tighten down.

Place air filter on the end of the intake tube in the fender well and tighten down with the supplied hose clamp.

Replace the battery. Reinstall the washer reservoir. Reinstall the driver's side fender well and wheel.



© 1997- Andy's Auto Sport | All Rights Reserved.